Exporting Scans with a Template
Efficiently exporting and sharing scan records is key to streamlining your operations. This guide will walk you through creating export templates, generating shareable links, and ensuring secure sharing of scan data. Follow these SEO-optimized steps to master the process.
Creating export templates simplifies data management by allowing you to filter, format, and structure scan data before exporting it.
Why Use Export Templates?
- Export only the data you need.
- Customize column arrangements and header names.
- Export data in raw format for further analysis.
How to Export Scans
Option 1: Export via the Tasks Page
- Go to the Tasks page.
- Click Add a Task and select Download Scans.
- Apply filters to select the desired records.
- Choose an Output Format and select an export template.
- Optionally schedule downloads for later.
- Click Create Task and then click the + symbol to generate a link.
- Name the link and, if needed, enable user login for secure access.
- Click Create ShortURL to finalize.
Option 2: Export via the Scans Page
- Navigate to the Scans page.
- Apply filters to narrow down the records.
- Choose an Output Format and select a template.
- Click Export CSV
- Select Save CSV Share Link.
- Name the link and enable user login if required.
- Save the download link.
Accessing All Share Links
You can view all created share links by navigating to Account > Settings > Share Links.
Direct CSV File Downloads
For a quick download:
- Select Export a CSV File on the right-hand menu of the Scans page.
- Choose email delivery or direct download.
- When the file is ready, a download button will appear in your task inbox.
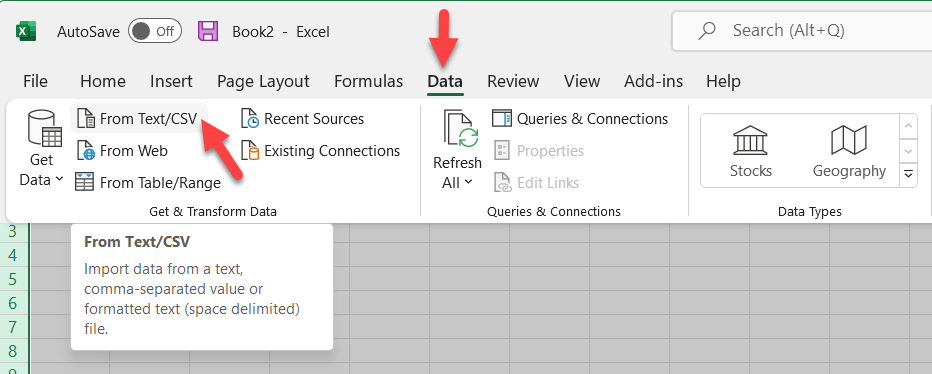
Tip for Excel Users: Use Data > From Text/CSV to import files and format data correctly.
Sharing Scan Records

Sharing scan data is simplified with CSV download links. These links can be distributed securely to employees, subcontractors, suppliers, or customers.
Steps to Share Scans
- Create user credentials on the Users page.
- While creating the link, check Require user login to restrict access.
- Customize reports for specific users and share unique links.
User Portal Features
- Displays up to 10,000 filtered scan records.
- Real-time updates upon clicking or refreshing the link.
- Allows users to search, set date ranges, and download files.
Important Notes:
- Ensure each link is named clearly with identifiers like ID, name, or location.
- Create at least one app username for sharing. Assign unique usernames if needed.
Advanced Options
- Creating an Export Template
Customize export templates to streamline repetitive exports. Define specific data arrangements, headers, and formats for easy reuse. - Exporting Scans to External Databases
Leverage integrations to automate exporting scans to third-party databases. Use scheduled tasks for seamless synchronization. - Exporting via Scheduled Tasks
Set up recurring tasks to automatically export and distribute scan records. This is ideal for large-scale operations or frequent updates.
By following this guide, you can efficiently export and share scan records while ensuring data security and accuracy. Whether you’re exporting for analysis or sharing with your team, these steps will help you save time and enhance productivity.