Table of Contents
Video Tutorial: How to Collect Photos & Custom Questions
For a quick overview, watch this tutorial on collecting photos and custom questions.

How to Collect Photos with CodeREADr
Learn how to streamline photo collection and manage captured signatures with this step-by-step guide.
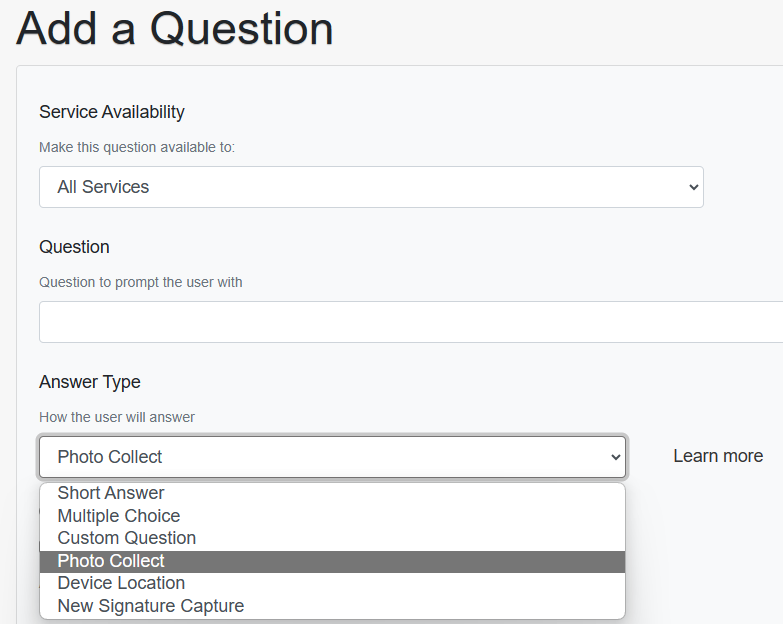
- Set Up Your Photo Collection Question
- Select the answer type: Photo Collect.
- Label the question clearly for app users.
- Decide if this question applies to all services or specific ones.
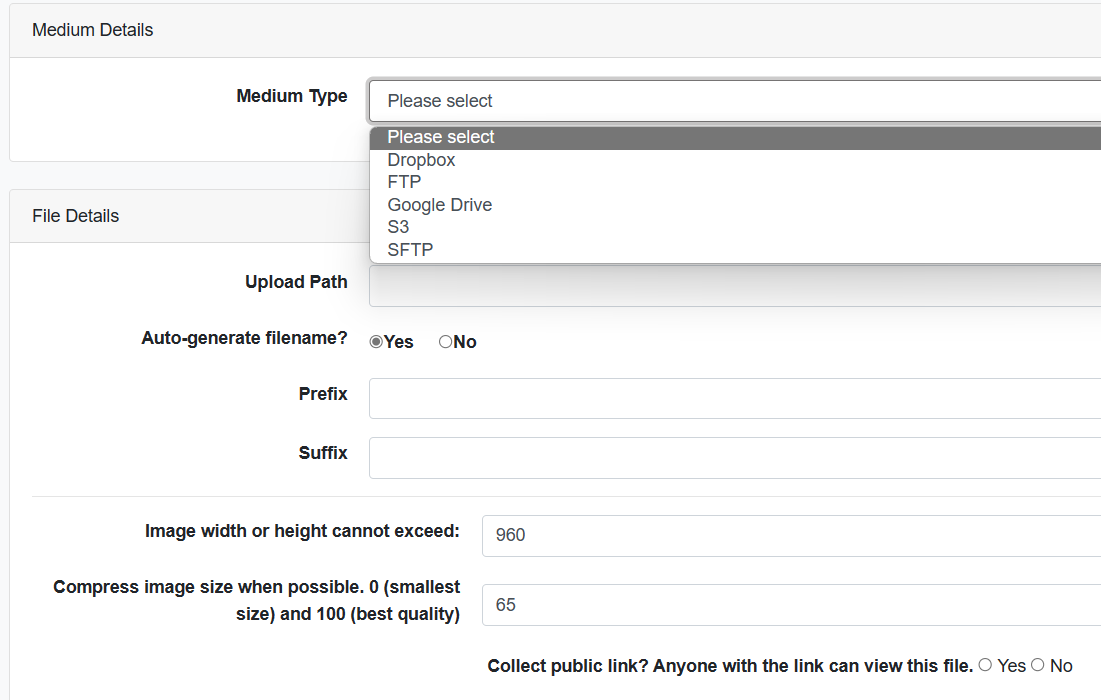
- Choose a Hosting Medium
- Select a host from the dropdown menu
- You can select a custom upload path but minimally you need to enter the forward slash symbol (/)
- For visibility in the CodeREADr Scans dashboard, enable Public Link by selecting “Yes.”
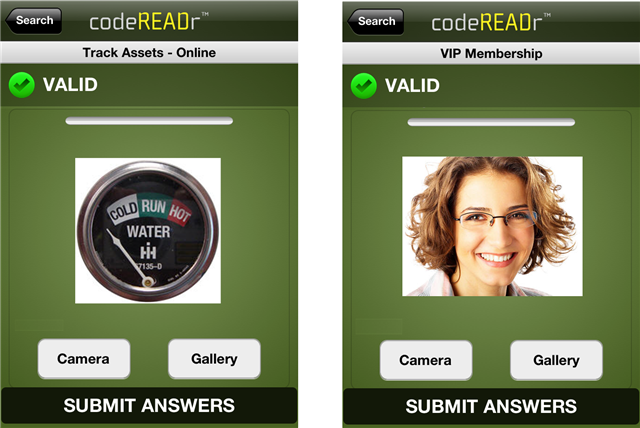
Notes on Photo Capturing
- Non-Barcode Initiated Records:
- Records can be created without scanning barcodes. Use the Manual entry, or the Lookup option to find the desired ID or object quickly.
- Uploading Edited Photos:
- Take photos with the app in the background, edit them, and save them to the gallery. Select the edited photo during scanning for inclusion in the scan record.
- Connectivity Requirements:
- Online Services: Photos cannot be captured offline. Scanning continues, but photo uploads must wait for restored connectivity.
- Offline Services: Photos are stored locally with a temporary ID. Once connected, tap Upload Scans to sync.
Integration with FTP
- Setup Instructions:
- Request FTP account details from your IT department.
- Add or edit FTP accounts via the External Accounts section on your Account page.
- Barcode Value Inclusion:
- Follow instructions in the Include Barcode Value section.
Note: Ensure any new FTP setup aligns with your organization’s security protocols.
Integration with Dropbox

- Account Linking:
- Use your existing Dropbox account (Free or Paid).
- Link a new account if needed by signing in through CodeREADr.
- Upload Path Configuration:
- Enter / to upload photos to the /Apps/CodeREADr folder.
- Create sub-folders (e.g., /employee_photos/) and use exact matching paths.
- File Naming:
- Avoid spaces; use underscores (e.g., /client_photos/).
- For advanced use, add prefixes like client_name_ or service_name_ for sorting.
- Optimize Image Sizes:
- Test different pixel sizes to balance file size and sync speed.
- Default settings:
- Image Size: 960 pixels
- Compression: 65%
- Shared Links:
- Enable Collect Link to create clickable links for photos in scan records.
- Disable for private uploads.

Advanced Features for Photo Collection & Signature Capture
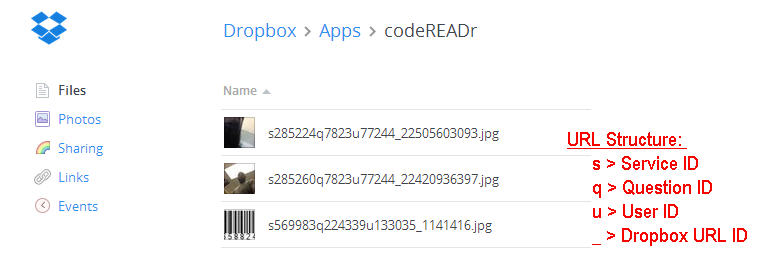
Include Barcode Value
- Add __SCAN_VALUE__ in the prefix/suffix field or disable auto-generated filenames and input __SCAN_VALUE__.
Auto-Add Photos to Validation Databases
- Link captured photos to barcodes for future verification.
- Use the Webify feature to include external images in your database.
Photo Management in Dropbox
- Photos appear as shareable links in scan records.
- Admins can review photos via the Scans page or exported files.
Best Practices for Photo Collection and Signature Capture
- Secure Photos: For sensitive data, ensure limited permissions and secure links.
- Testing: Always test paths, file sizes, and compression settings for optimal performance.
- Support: Contact support@codereadr.com for advanced configurations or security needs.
This guide ensures you’re equipped to collect, upload, and manage photos seamlessly with CodeREADr while keeping your workflow efficient and secure.