Table of Contents
What Are Roles and How to Manage Them
Roles enable account owners to securely share account access with multiple users without revealing login credentials. By assigning specific roles, you can define each user’s permissions and control their level of access to the desktop site and mobile app. This guide explains how to manage roles effectively.
How to Add and Manage Roles
- Navigate to the Users Section:
- Select “Users” in the main menu.
- Click the tab for “ADMINS”.

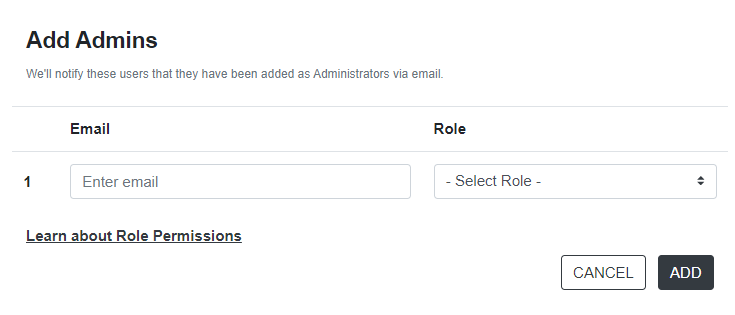
- Add a New Admin:
- Click “ADD USER”.
- Enter the user’s email address (required for admin accounts) and select a role.
- The system will send an email to the provided address with instructions for creating a password.

Note: While admin usernames must be email addresses, mobile app usernames can be plain text.

Role Types and Permissions
- Master Admin
- Full Access: Master admins can access all areas of the desktop site and mobile app.
- Billing Authority: Only master admins can view or update billing information.
- Data Admin
- Limited Access: Data admins have access to most site functions, including managing services, databases, users, and scans.
- Billing Restrictions: Data admins cannot view or update billing information.
- Mobile App Users
- App-Only Access: Mobile app users can only log in to the mobile app.
- No Site Access: They cannot make changes to services, databases, users, tasks, or scans via the website.
Key Takeaways
- Role Assignment: Assign roles based on the user’s responsibilities to streamline operations and maintain security.
- Secure Login Credentials: Use unique email addresses for admins and plain text usernames for mobile app users, if applicable.
- Billing Access: Restrict billing information to master admins to enhance security.
By defining roles strategically, you can ensure efficient management of your account while maintaining strong access controls. For additional assistance, refer to our Support Center.