What Is Check-In/Out?
The Check-In/Out service is a versatile tool designed to help app users verify and record the status of specific values. Common use cases include:
- Attendance Tracking: Record who has checked in or out of an event, class, or workspace.
- Asset Management: Track assets like equipment or inventory at sites, in warehouses, or during transport.
- Customizable Validation: Optionally integrate a checklist to control which items can be checked in or out.
- Simple Attendance: Record attendance even when there’s no predefined list.
How to Set Up Check-In/Out Service
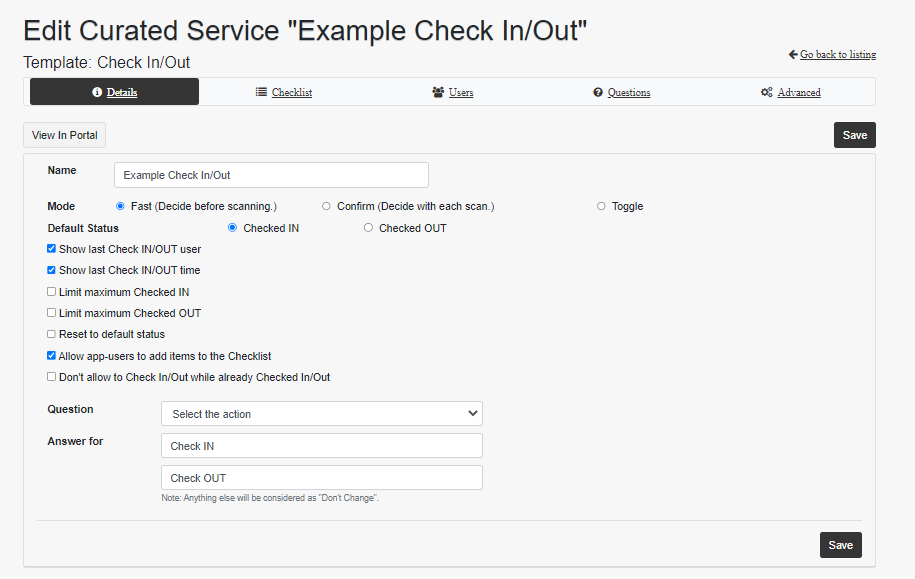
- Name Your Service and Choose a Mode
- Select the operation mode that best suits your needs:
- Fast Mode: Allows users to select an action (check-in or check-out) and apply it to a series of scans sequentially.
- Example: Choose “Check-In” for scanning attendees at the start of an event and “Check-Out” at the end.
- Confirm Mode: Requires users to specify the action (check-in or check-out) for every individual scan.
- Toggle Mode: Automatically alternates between check-in and check-out actions for each scan, reducing user interaction.
- Example: If a person was already checked in, the next scan will check them out automatically.
- Fast Mode: Allows users to select an action (check-in or check-out) and apply it to a series of scans sequentially.
- Select the operation mode that best suits your needs:
- Set Default Values for Unscanned Items
- Define the default status for unscanned values. For example:
- Attendance tracking: Unscanned individuals are marked as “Checked Out.” As they arrive, they are scanned and “Checked In.”
- Asset tracking: Unscanned items are marked as “Checked In.” As they are taken from inventory, they are scanned and “Checked Out.”
- Define the default status for unscanned values. For example:
- Configure User and Action Rules
- Show Last User and Timestamp: Enable this option to display the last activity details for a value.
- Duplicate Action Handling: Prevent duplicate check-ins/outs or allow users to override them with a new selection.
- Custom Action Questions: Replace the default “Select the action” question with a custom query. Questions can be created via the Questions tab in your account.
- Set Maximum Check-In/Out Limits
- Define a limit for the number of items that can be checked in or out at once. For instance:
- If the limit is 3, any additional scans beyond this will be marked as invalid until items are checked out.
- If a venue has a capacity limit of 100 people, only 100 values can be checked in at one time.
- Define a limit for the number of items that can be checked in or out at once. For instance:
- Upload a Validation Checklist
- Use a checklist to control the values eligible for check-in/out. Refer to the Checklist Import Guide for detailed steps.
- Download Check-In/Out Records
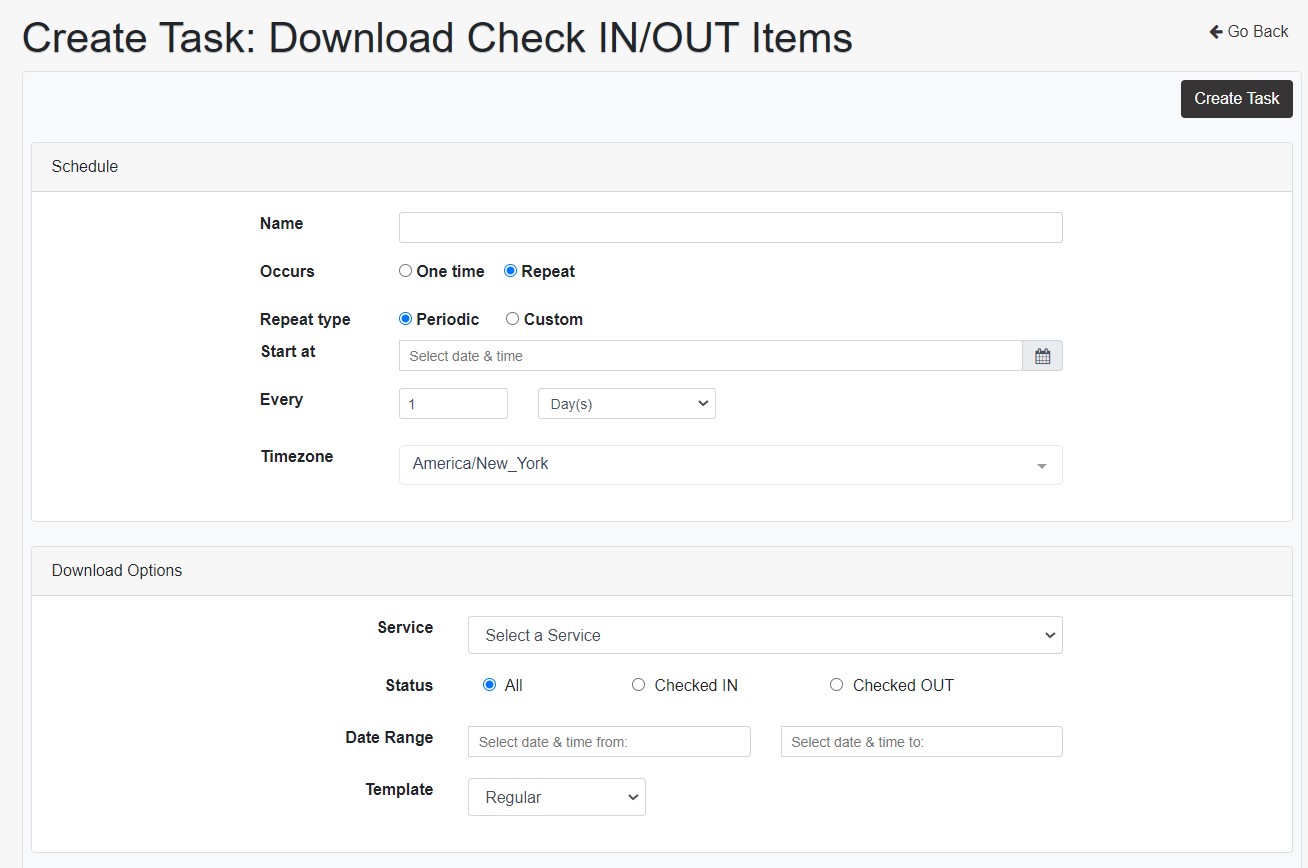
- To download and analyze your check-in/out records:
- Go to the Tasks Page and click “Add a Task.”
- Schedule periodic exports or download records manually.
- Filter data by:
- Specific date ranges
- Check-in or check-out status
- Template type (Regular, Extended, or History)
- To download and analyze your check-in/out records:
- Templates for Exported Records
- Regular: Includes the most recent timestamp and status for each value.
- Extended: Adds the first and last statuses and timestamps, plus a duration column.
- History: Contains all scanning event timestamps and statuses for every value.

Using the Check-In/Out Service in the App
When app users access this service:
- They’ll select the action (Check-In or Check-Out) depending on the chosen mode.
- Scans will display as valid or invalid based on configuration.
- Valid Check-Ins: Items/attendees successfully checked in.
- Invalid Scans: Duplicate scans or scans exceeding limits.
Example Views:
- Fast Mode: Displays session info for sequential actions.
- Confirm Mode: Prompts action selection for every scan.
- Toggle Mode: Automatically alternates between Check-In and Check-Out.
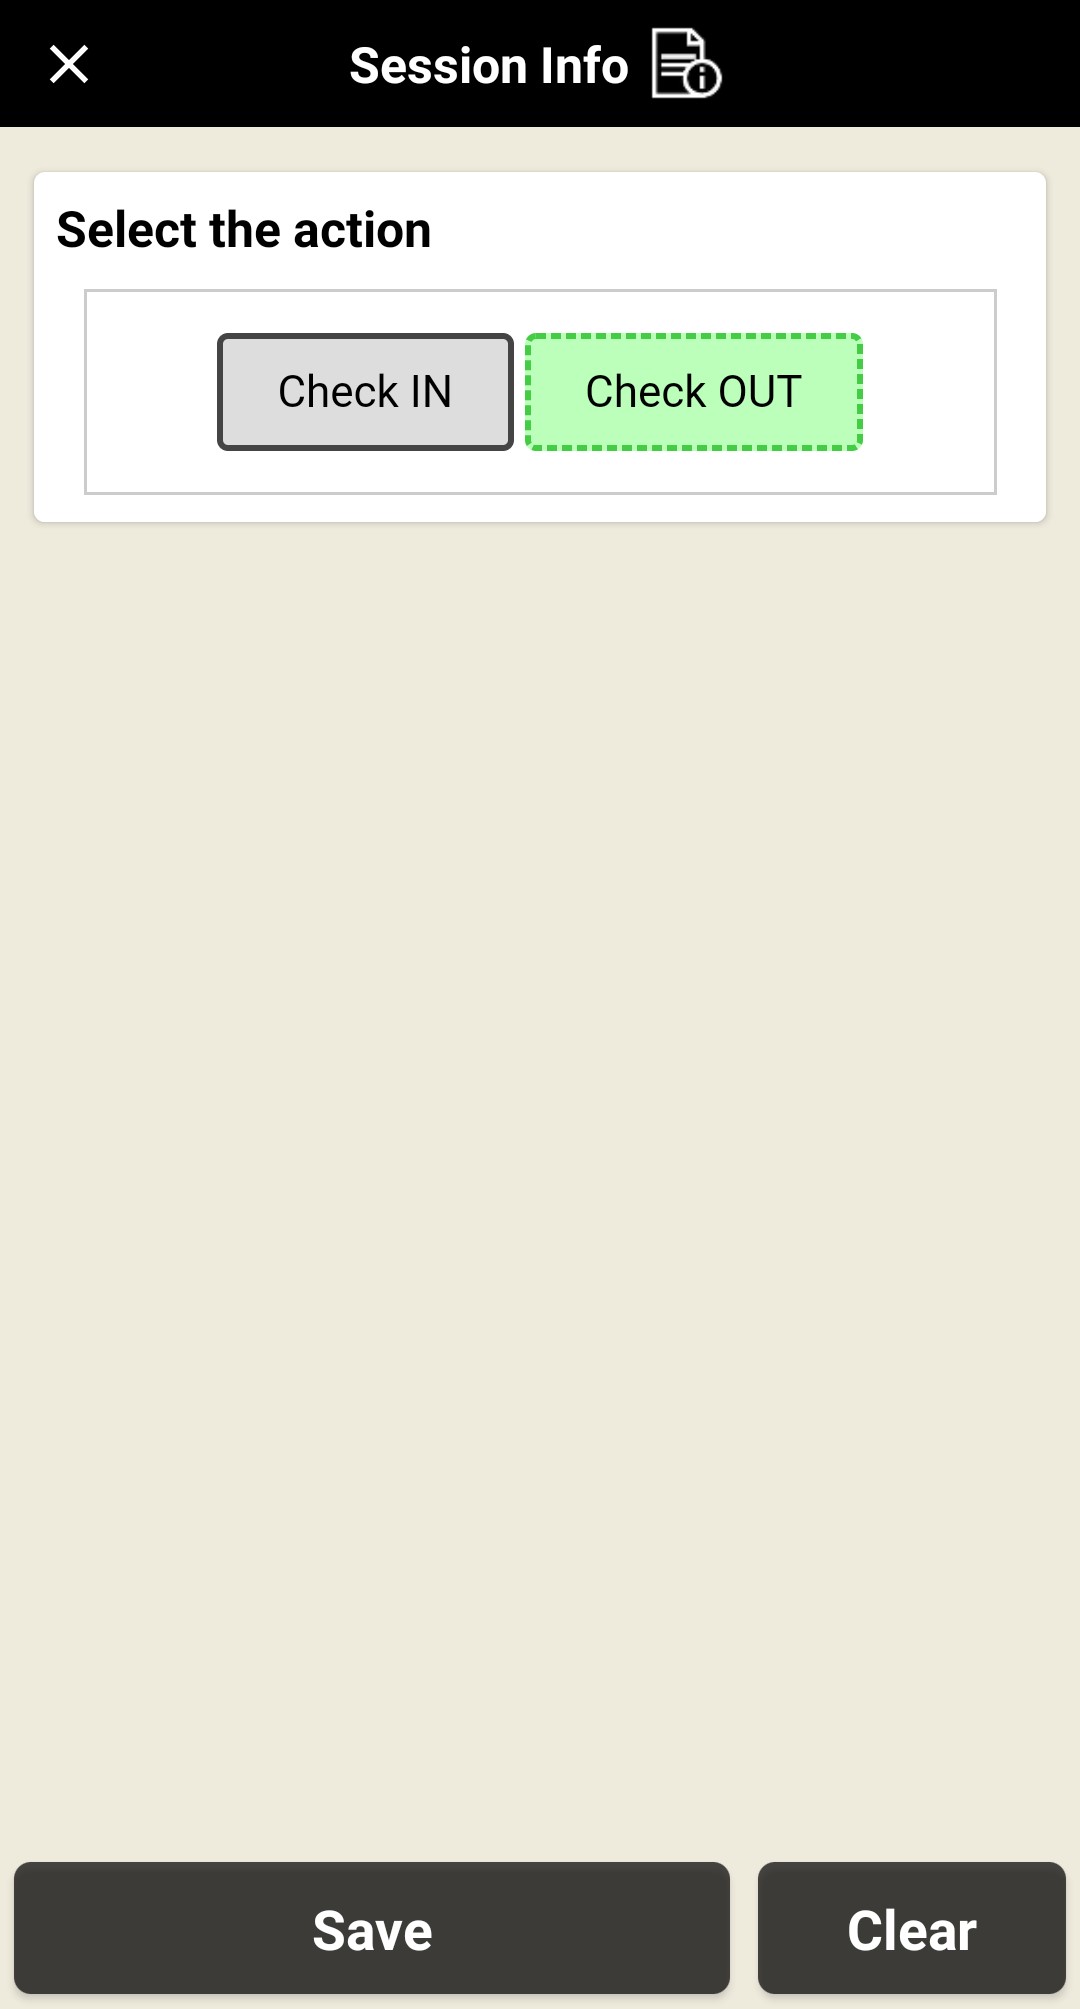
When your authorized mobile app user(s) choose this service on the mobile app, they will see this screen:

In this example, we need the session info because we are using Fast Mode.

Once you choose the action, you can proceed to scan. Checked IN valid scans appear like this:

All valid scans will appear this way until a new action is chosen:
When you select Check OUT, all valid scans will appear as so:

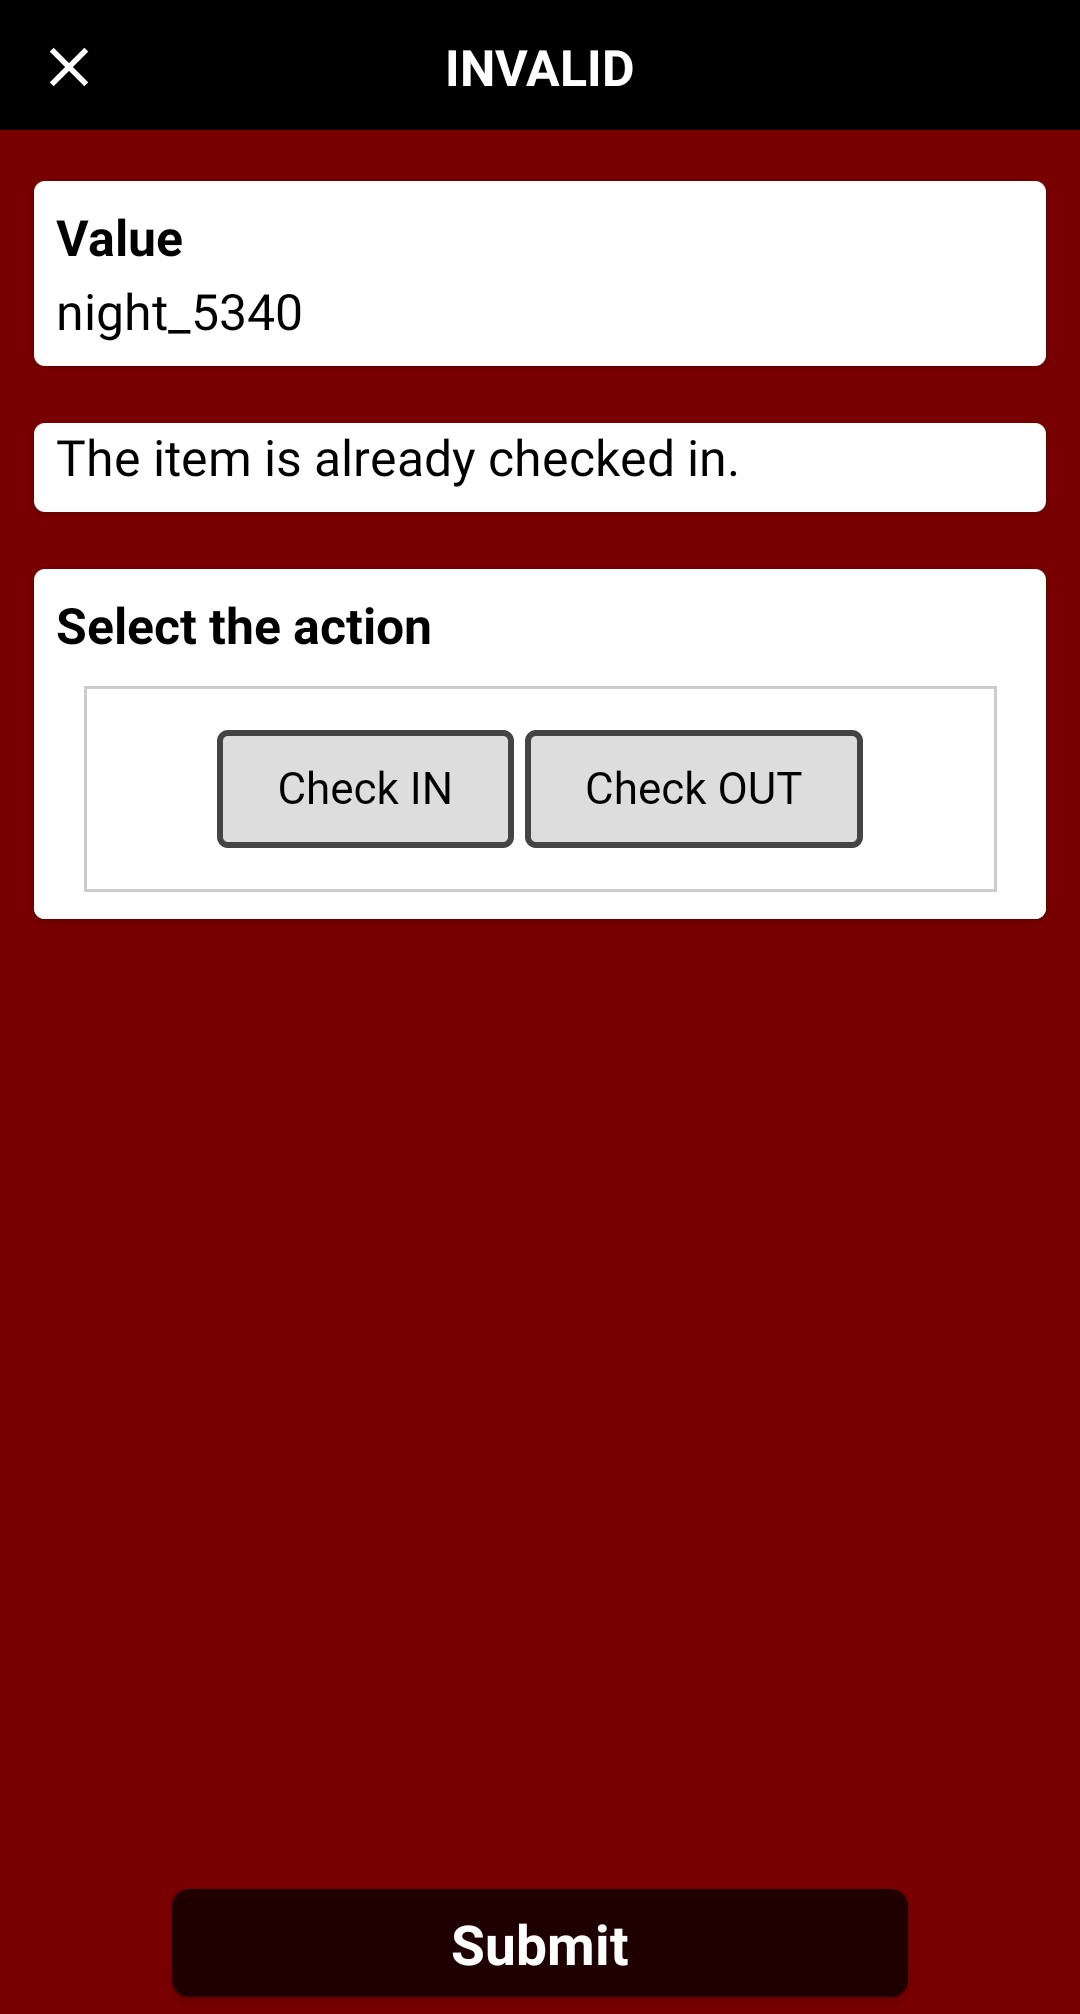
In Fast Mode with duplicate Check-In/Out disallowed but the question not shown, invalid scans appear as so.
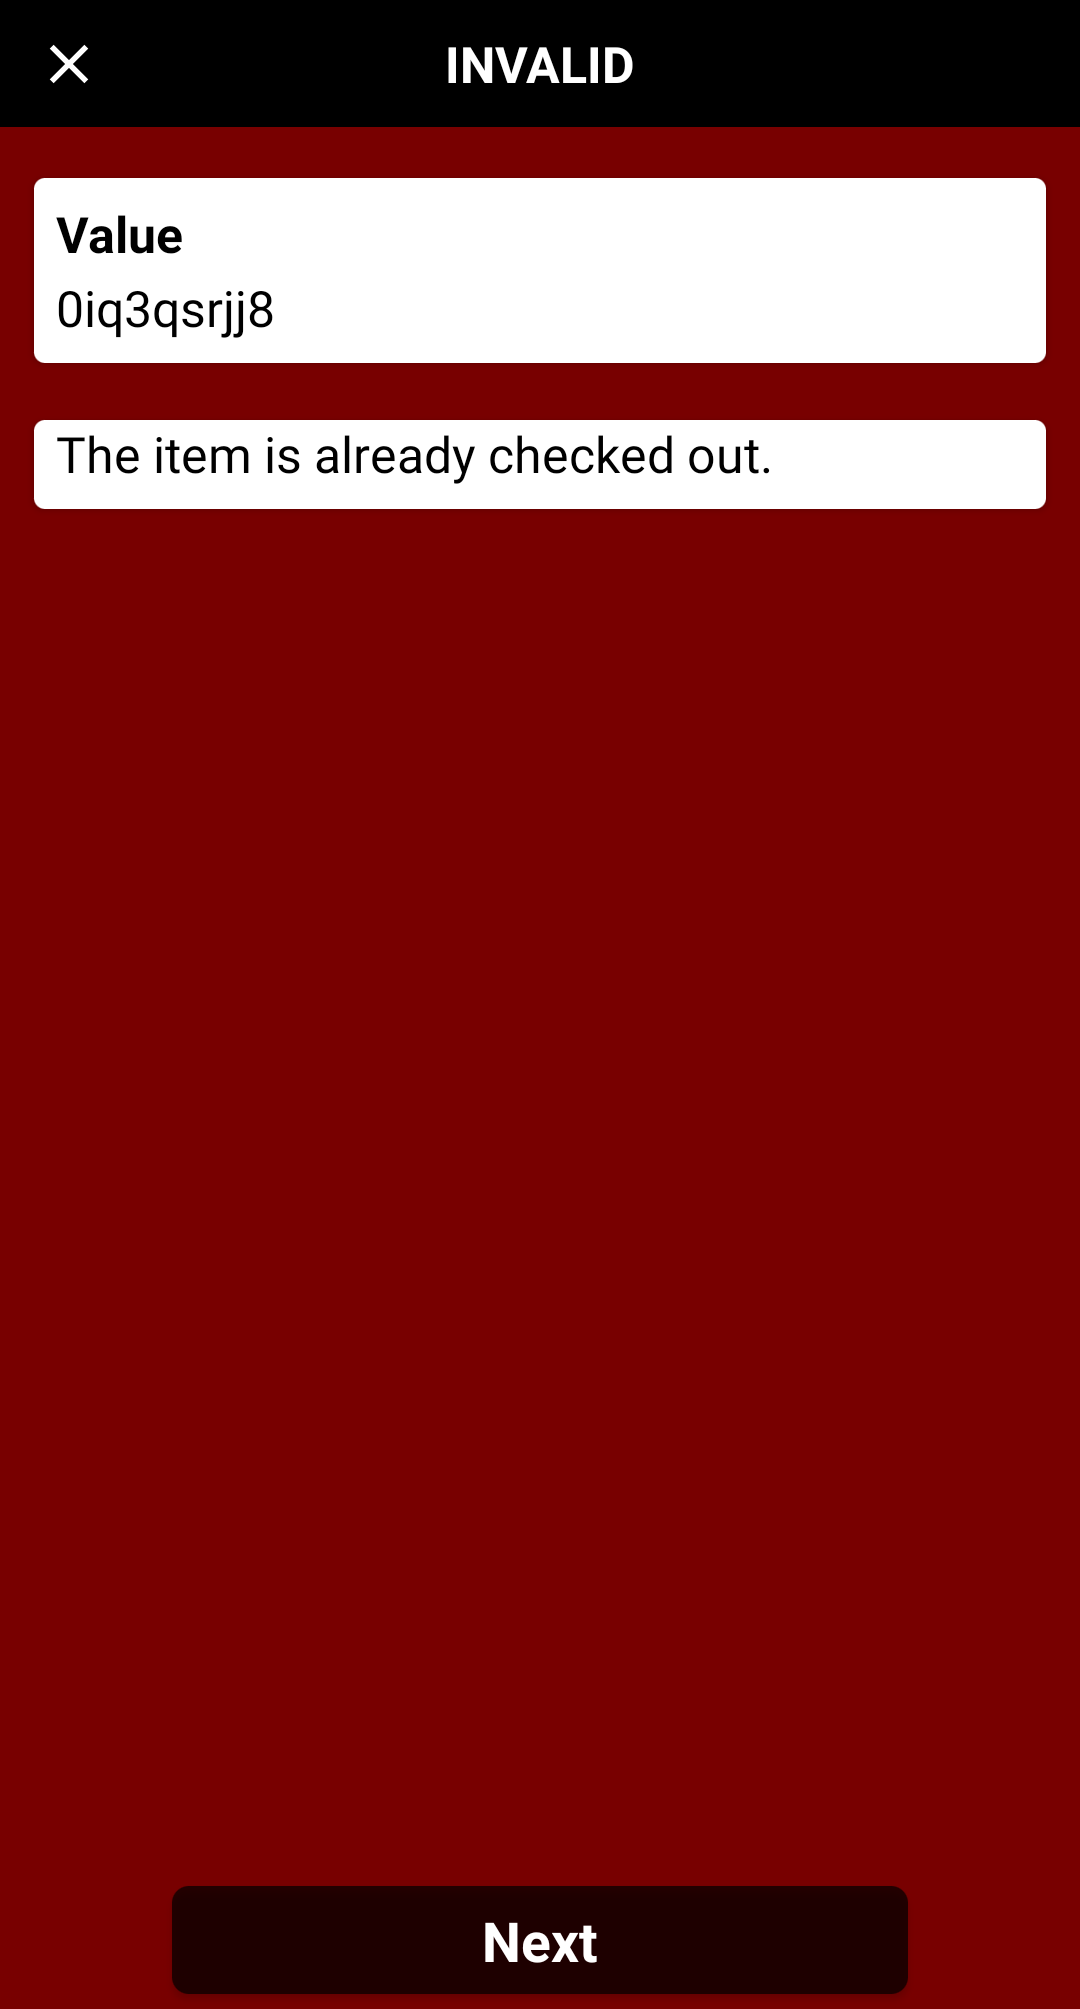
In Fast Mode with duplicates disallowed and the question asked again, invalid duplicates will be shown with the option to answer much like in Confirm Mode. Selecting an option here does NOT change the session info for subsequent scans.
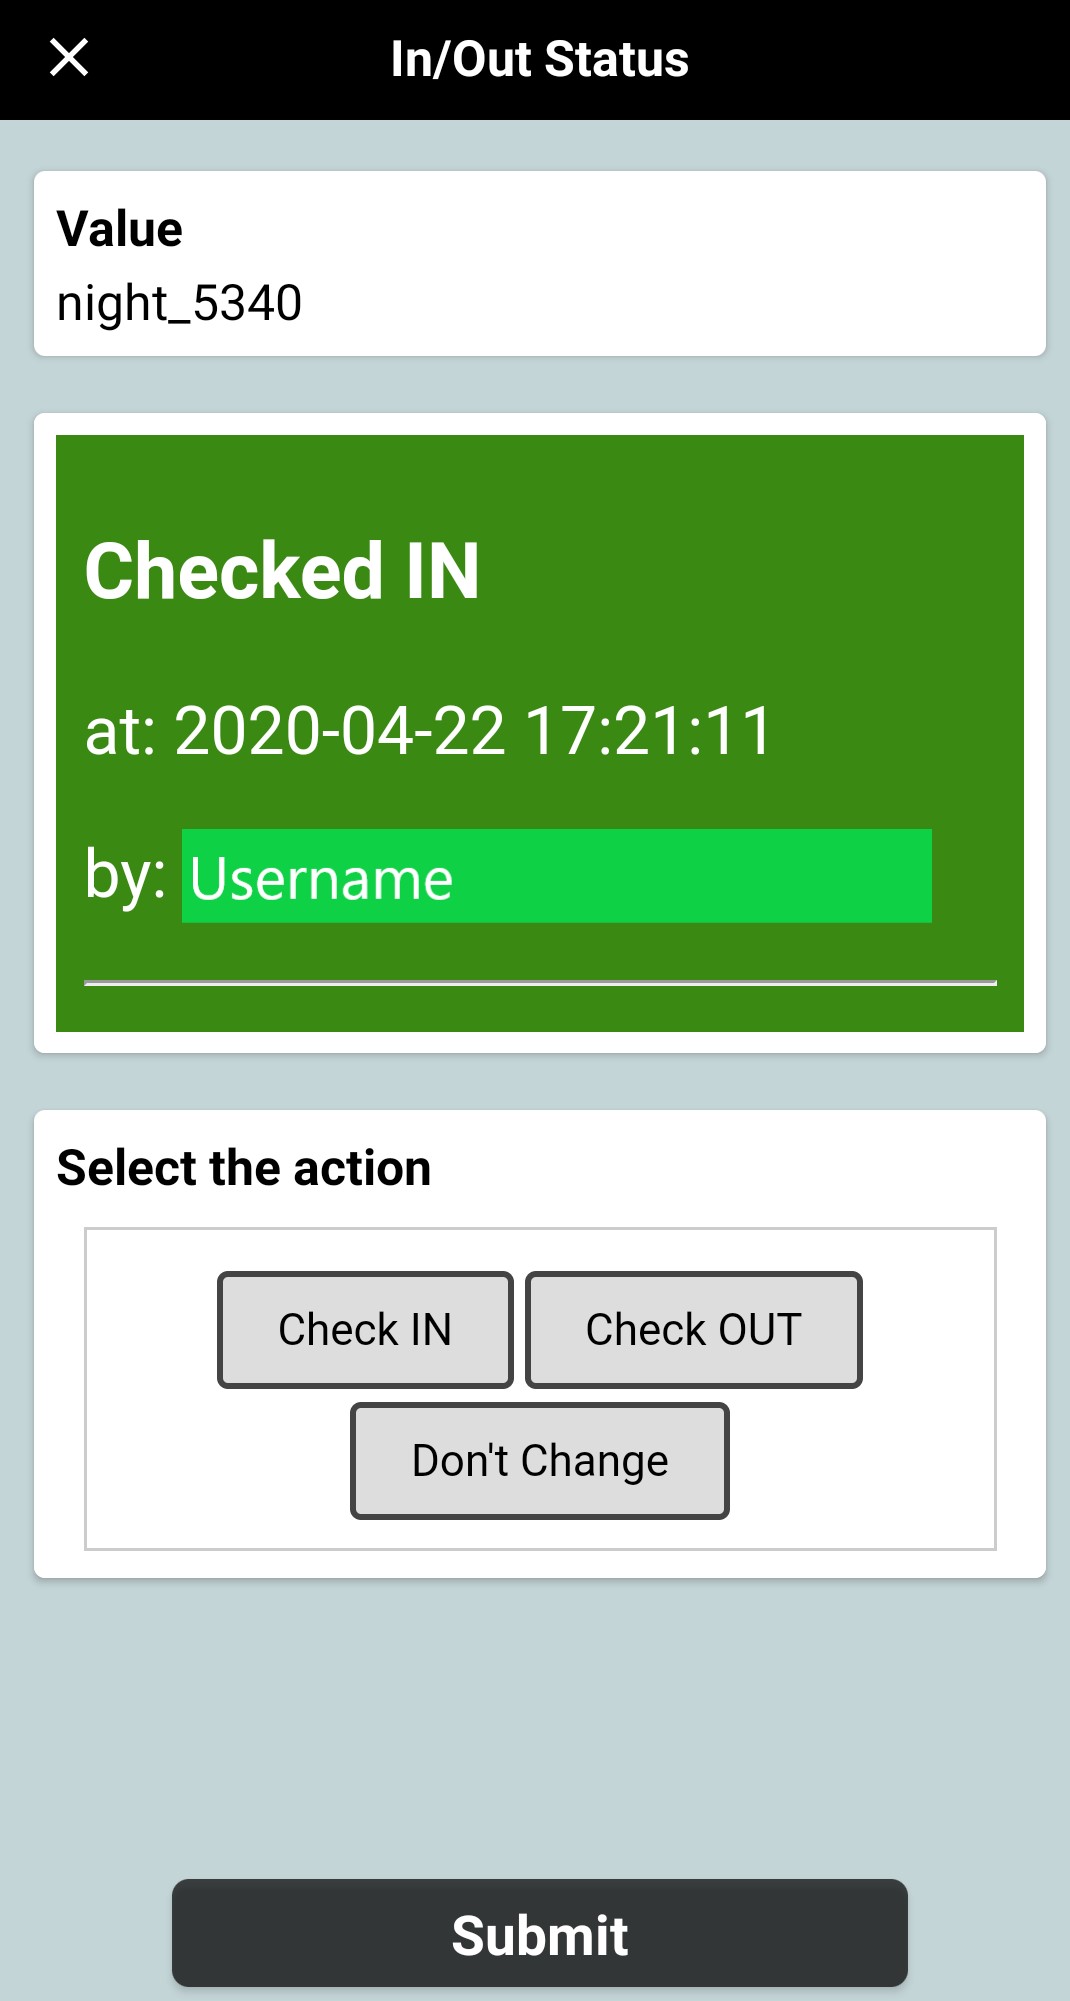
As with any service, you can customize the display of the response. This image shows the default response. If you have selected Confirm Mode, there will be no session info to select on the app screen. Instead, with each scan, the default (either Checked IN or out based on what you designated on Step 2) will appear and the user can define the action for that scan:
Viewing and Managing Records Online
Web Portal
On the CodeREADr website:
- View Current Statuses: Access real-time data under “View Items in Portal.”
- Sorting Options:
- ID: Sort by barcode value.
- Description: Sort by response value alphabetically.
- Timestamp: Sort by scan time.
- ASC/DESC: Order results ascending or descending.
Mobile App
Users can:
- View Statuses: Check statuses via the “Lookup” tab.
- Refresh Records: Auto-refresh is available, with manual refresh via the refresh icon.


On the mobile app, your app user(s) can view statuses by clicking on the “Lookup” tab. It auto-refreshes the in-app web view. However, you can manually refresh by tapping the refresh icon.

Managing Records with Automatic Cleanup
To keep records manageable and improve app performance:
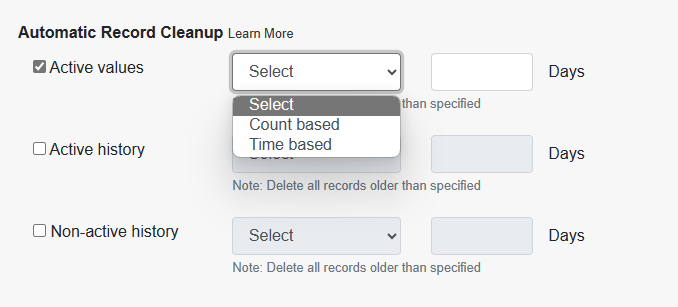
Cleanup Actions
- Count-Based: Retain a set number of recent records.
- Time-Based: Retain records from a specific time range.
Checklist Management
- Active Values: Remove outdated checklist items (e.g., monthly or annually).
- Active History: Retain in/out records linked to the current checklist.
- Non-Active History: Manage records for values no longer in the checklist.
Optimize Your Workflow
By leveraging the Check-In/Out service, you can efficiently track attendance, manage assets, and streamline operations. For further customization, visit the Help Center or contact our support team.